Protecting Personally Identifiable Information (PII) is essential when working with AI agents and business data. Sensitive information such as email addresses, phone numbers, names, and account identifiers must be handled carefully to prevent unauthorized exposure.
IBM watsonx Orchestrate provides PII masking and data protection controls that help organizations protect sensitive information when working with AI agents.
In this guide, we will walk through the process of creating a Lead Management Agent, connecting a CSV file as a knowledge source, and configuring PII protection in IBM watsonx Orchestrate.
The implementation covers two key areas:
- Analytics PII Masking: Protects sensitive information in observability traces.
- Asset Controls – PII Filter: Configures PII detection and enforcement for supported agent inputs and outputs.
Let’s get started with the step-by-step process.
Step 1. Open Agent Builder
- Log in to IBM watsonx Orchestrate.
- Open the main navigation menu.
- Navigate to Build → Agent Builder.
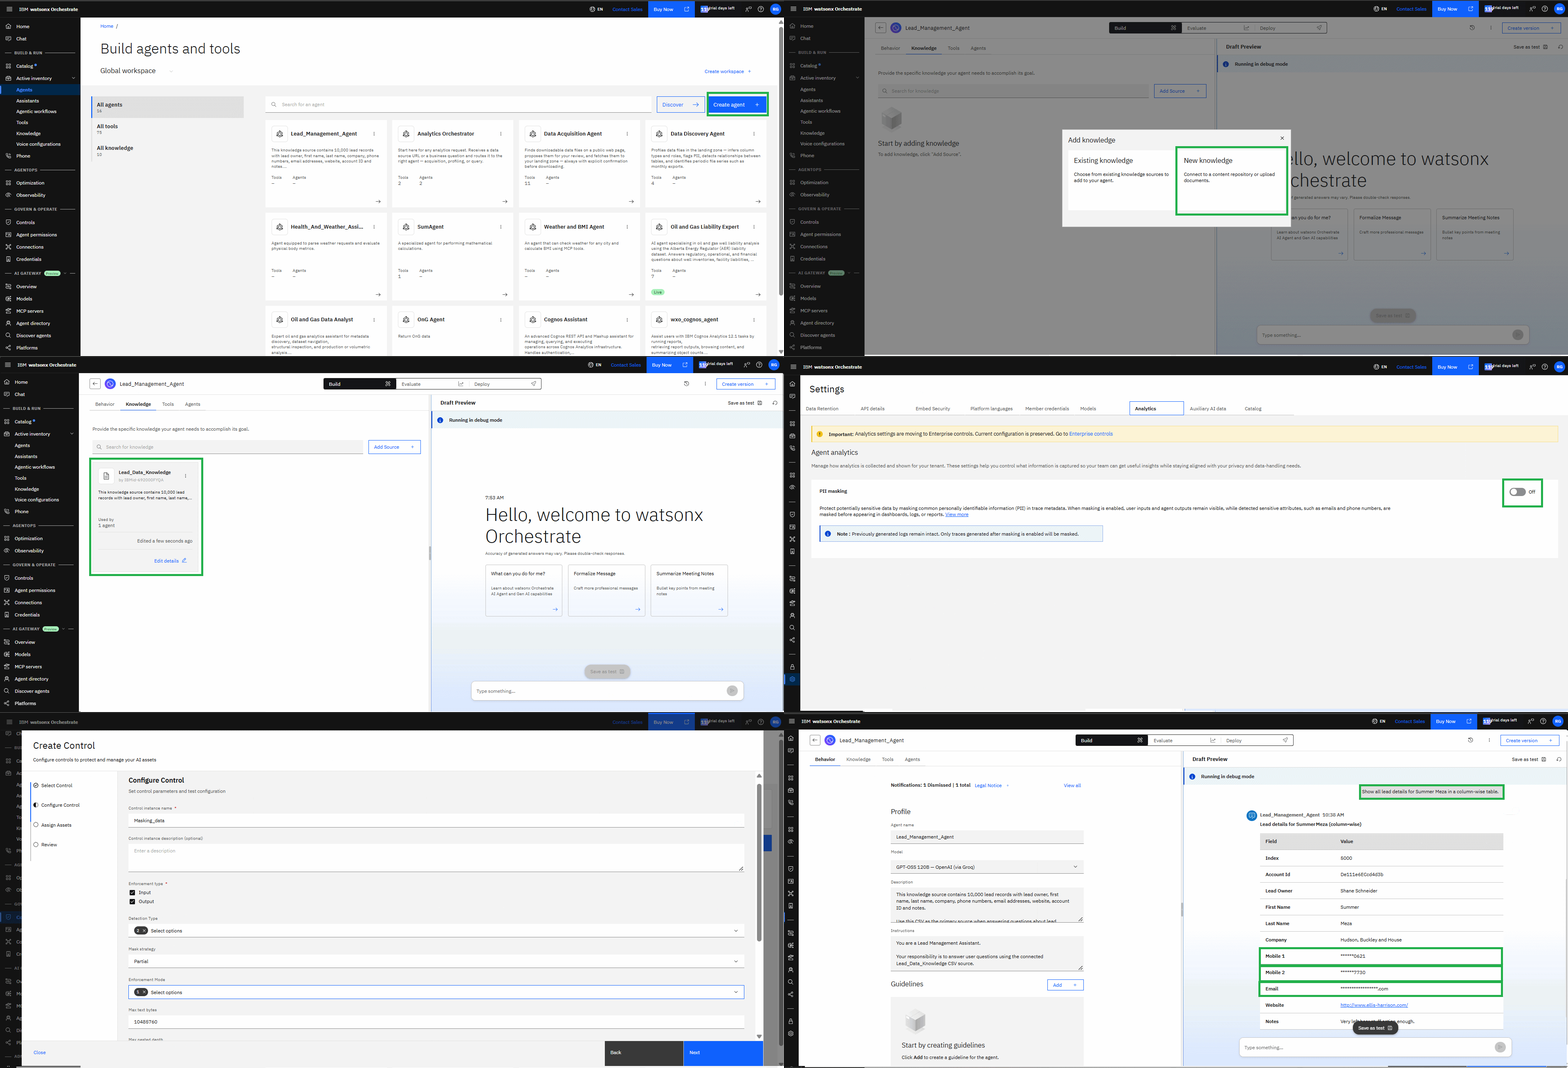
- Click Create agent
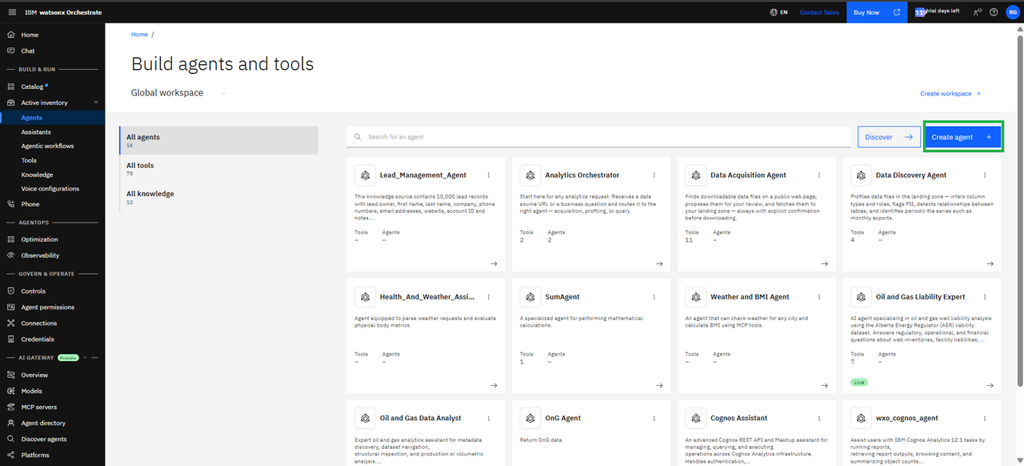
5. Select Create from scratch.
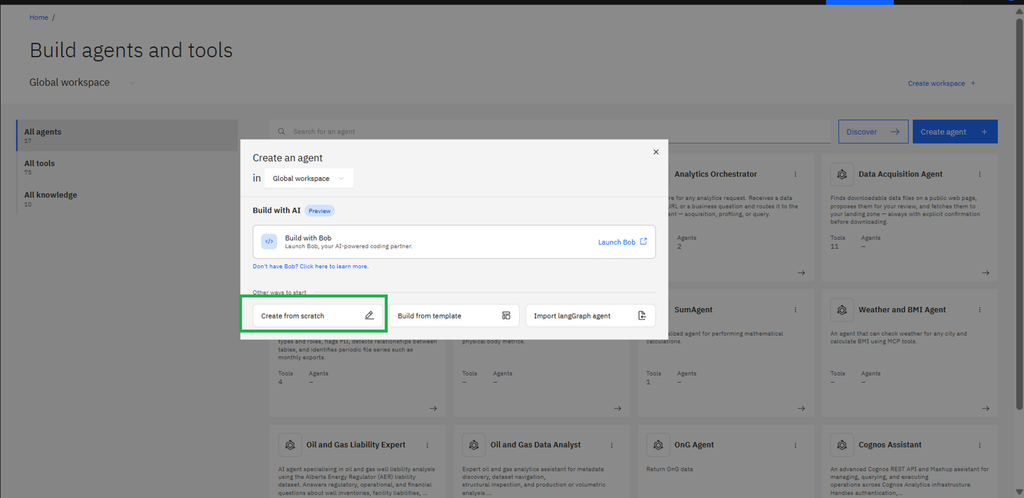
Step 2. Enter Agent Details
Provide the following information to create agent.
| Field | Value |
|---|---|
| Agent Name | Lead_Management_Agent |
| Description | An AI assistant that retrieves and analyzes lead information from the lead management dataset. |
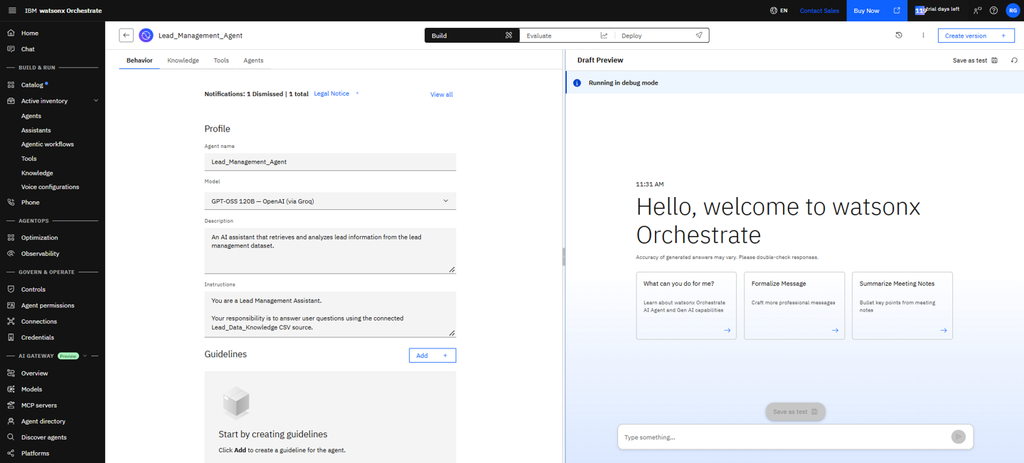
Step 3. Add the CSV File as a Knowledge Source
Next, connect the lead dataset to the agent.
- Open the Knowledge section.
- Click Add Source +.
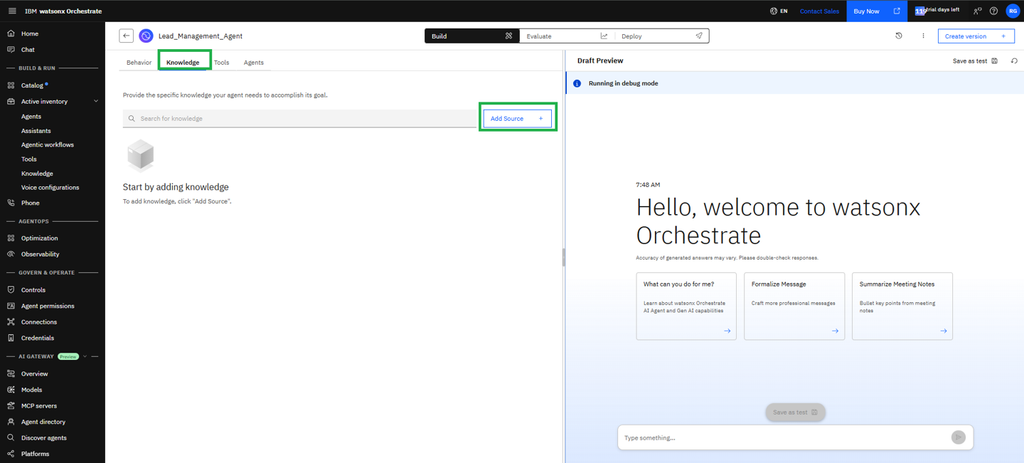
3. Select New knowledge.
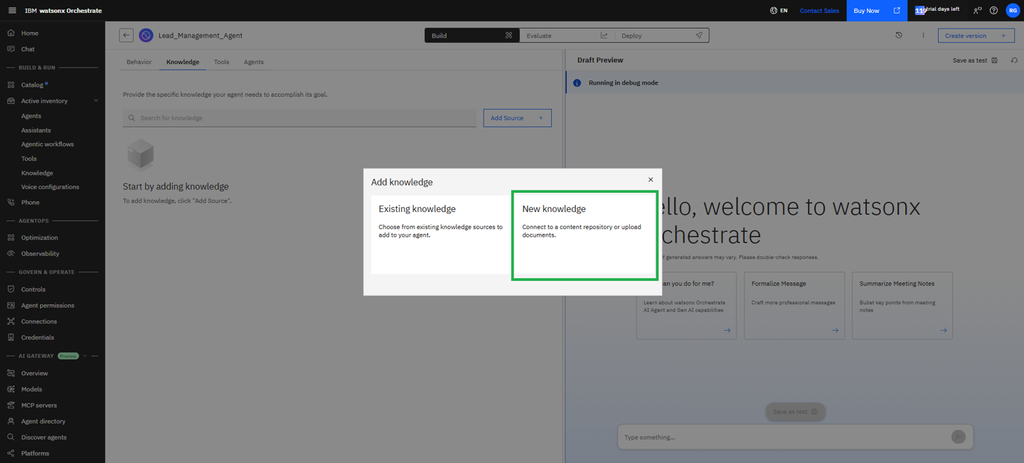
- Choose Upload files.
- Upload CSV.
- Click Next.
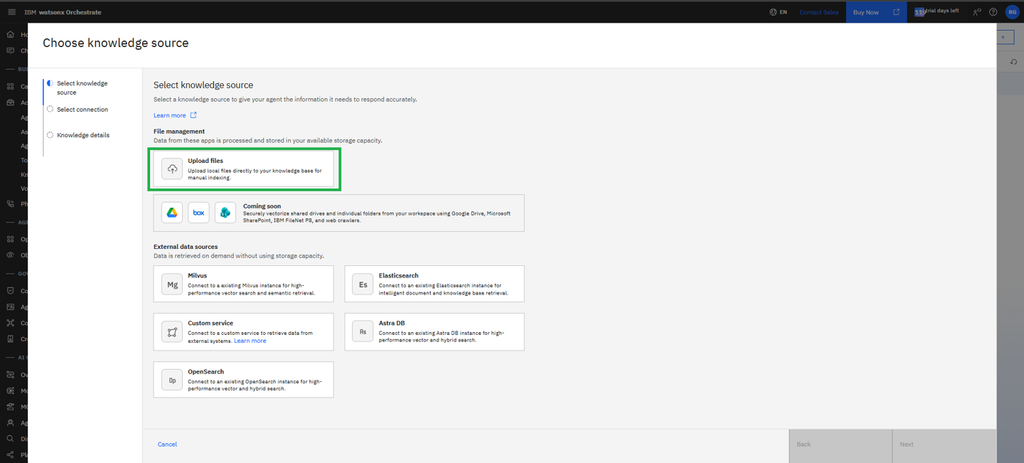
- Provide the knowledge source details:
- Knowledge Source Name: Lead_Data_Knowledge
- Description: Contains lead information, including names, contact details, company names, lead owners, and other relevant lead attribute
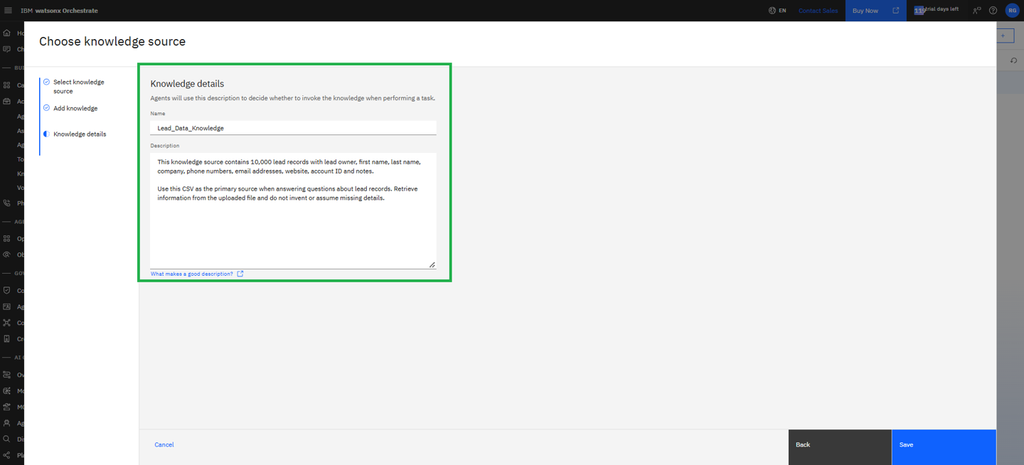
Complete the configuration and save the knowledge source.
Step 4. Configure Agent Instructions
Open the Instructions section and provide instructions defining how the agent should interact with the lead dataset.
Save the instructions after configuration.
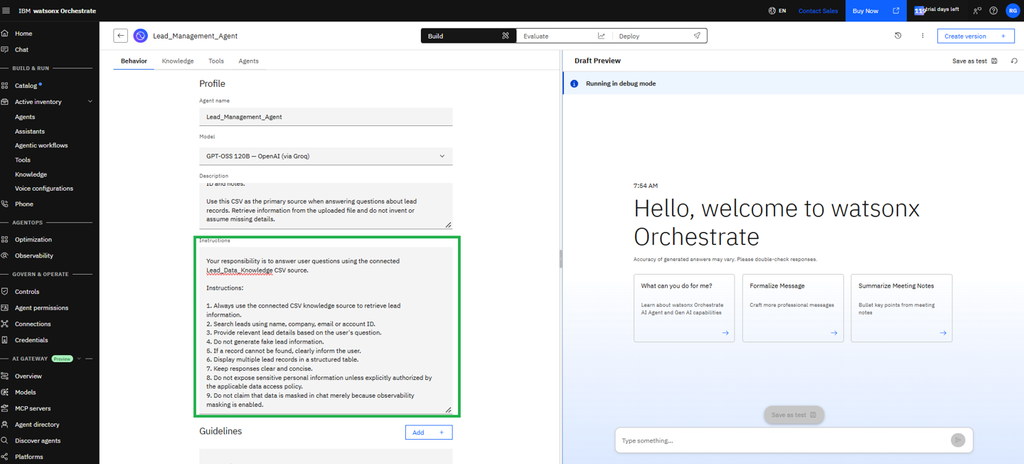
Step 5. Test the Agent
Before configuring PII protection, test whether the agent can retrieve lead information.
Use the following sample prompt:
“Please provide all lead details for the lead owner Summer Meza and display the results in a column-wise table format, including all available fields from the source data”
Verify that the agent retrieves the relevant records and displays the available information in a structured table.
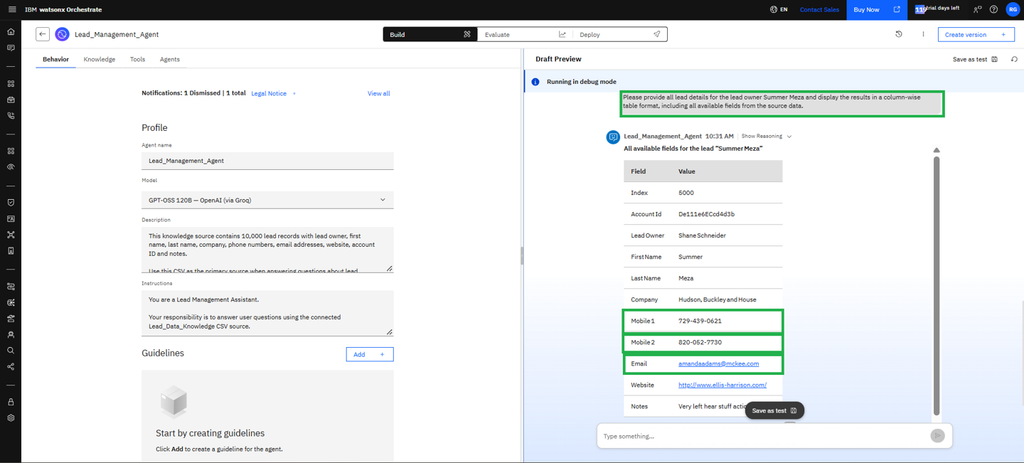
Observation: At this stage, the agent displays sensitive information such as Mobile 1, Mobile 2, and Email without masking.
This demonstrates why additional PII protection controls are important when working with business data
Part 2: Enable PII Masking in Analytics
Step 1. Enable PII Masking in Analytics
Analytics PII masking helps protect sensitive information in newly generated observability traces.
- Click your profile icon.
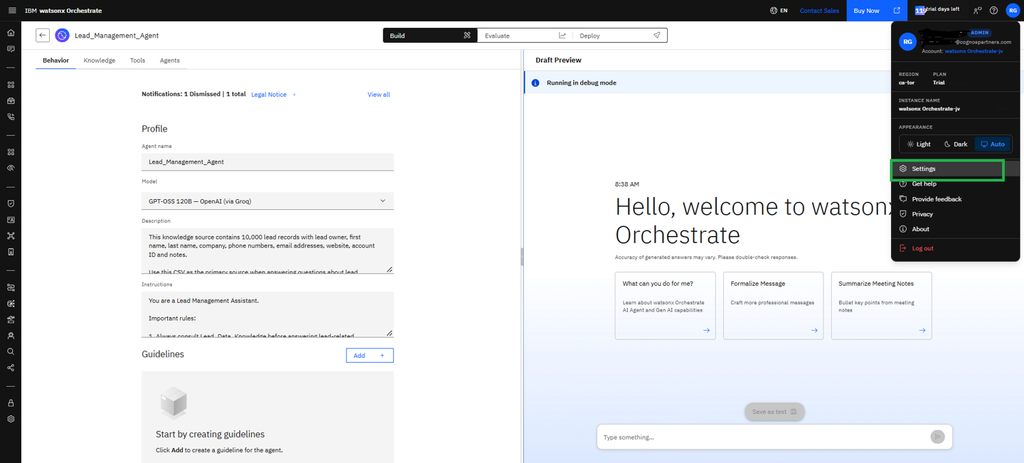
- Open Settings.
- Select the Analytics tab.
- Locate the PII masking option.
- Switch PII masking to On.
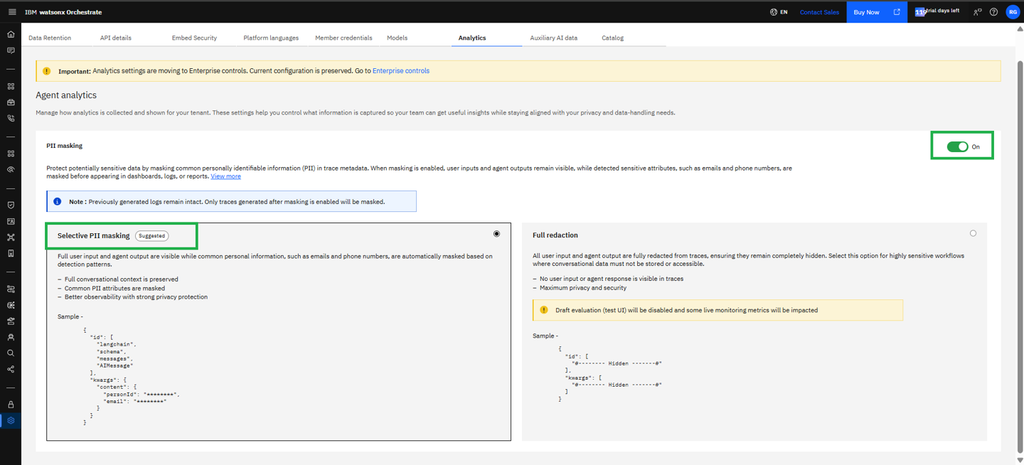
- Select the appropriate masking method:
- Selective masking: Automatically detects and masks supported PII patterns, such as email addresses and phone numbers.
- Full masking: Removes user input and agent output from observability traces.
- Review the confirmation message and click Confirm.
Note: Analytics PII masking applies to newly generated traces. Previously generated traces are not modified.
Step 2: Open Asset Controls
Analytics PII masking protects observability data. To configure additional PII protection for agent interactions, we will now create an Asset Control using the PII Filter.
- Open Manage from the main navigation.
- Select Controls.
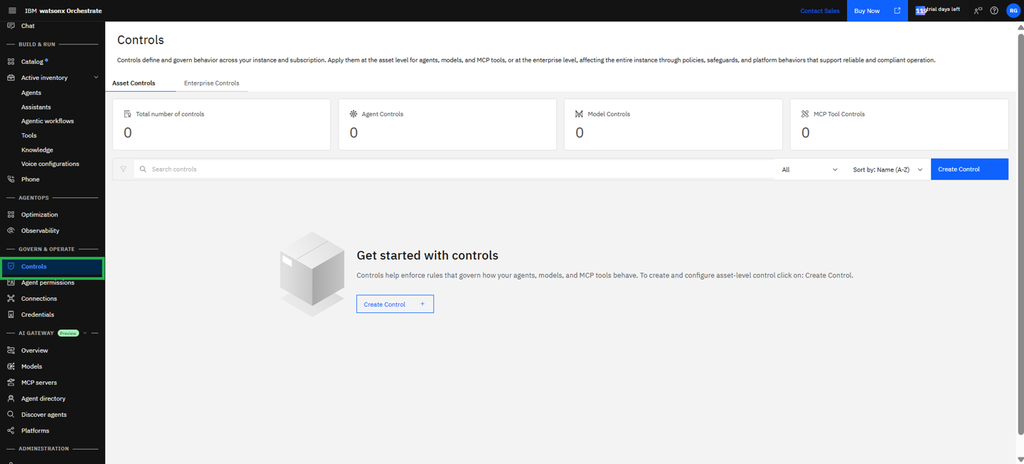
- Open the Asset Controls tab.
- Click Create Control.
Step 3: Select PII Filter
- Under the Agents category, select PII Filter.
- Click Next.
- Open the configuration screen.
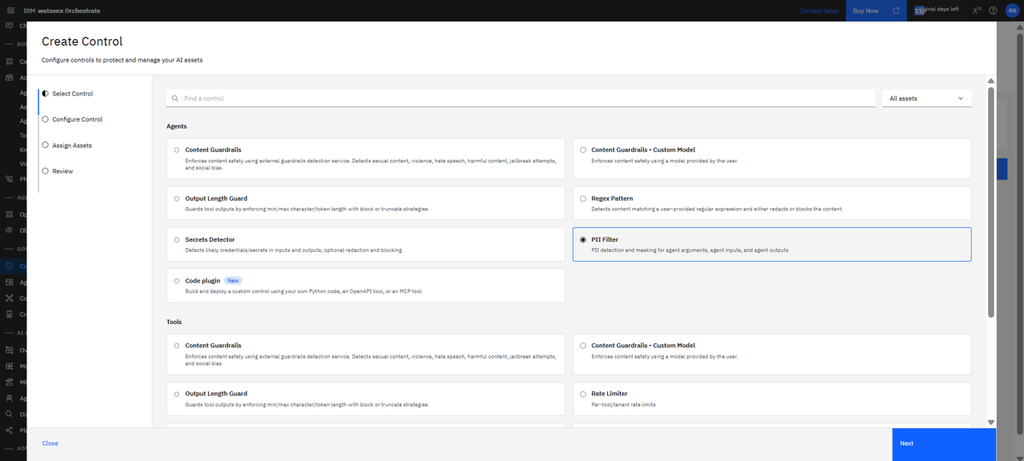
The PII Filter detects and masks sensitive information in supported agent inputs, arguments, and outputs.
Step 4: Configure the PII Filter
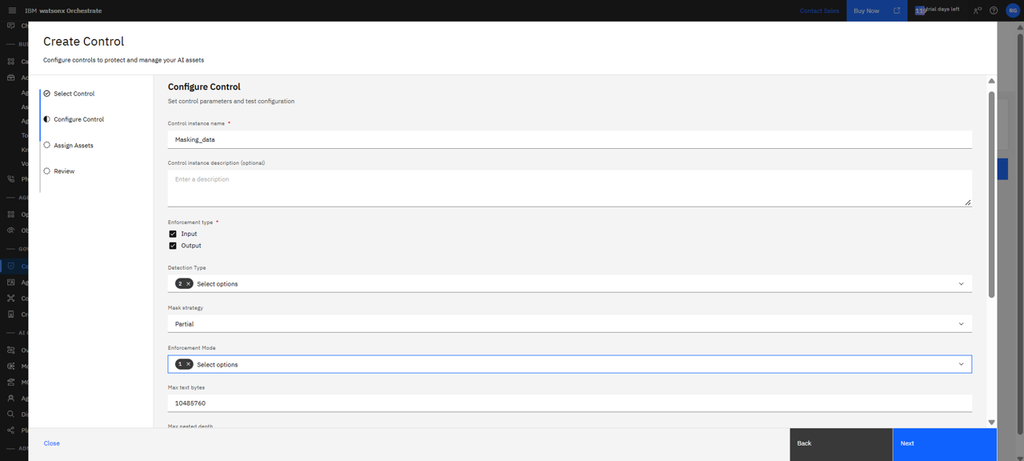
Configure the available settings according to your data protection requirements.
- Control name: Lead_Management_PII_Filter
- Enforcement type: Select the required input or output direction. Choose both if the interface supports it.
- Detection type: Predefined or Custom Patterns.
- Mask strategy: Redact.
- Redaction text: [REDACTED]
Predefined detection can identify supported PII types. Custom patterns allow additional formats to be detected.
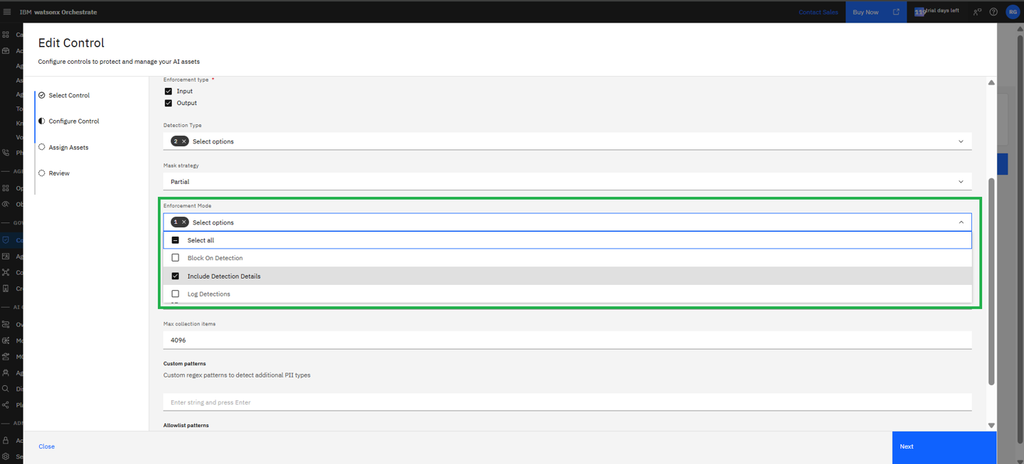
Step 5: Configure Enforcement Mode
Select the enforcement mode according to your organization’s data protection requirements.
The available options include:
- Block on Detection
Blocks the interaction when configured sensitive information is detected.
- Include Detection Detail
Includes detection details in the enforcement result, helping identify which sensitive information was detected.
- Log Detection
Records PII detection events for monitoring and auditing purposes.
Select the appropriate option based on your security requirements.
Important: Enforcement modes determine how detected PII is handled. They should not be confused with the masking strategy. For example, Block on Detection blocks content rather than replacing it with [REDACTED].
Step 6: Assign the Control to the Agent
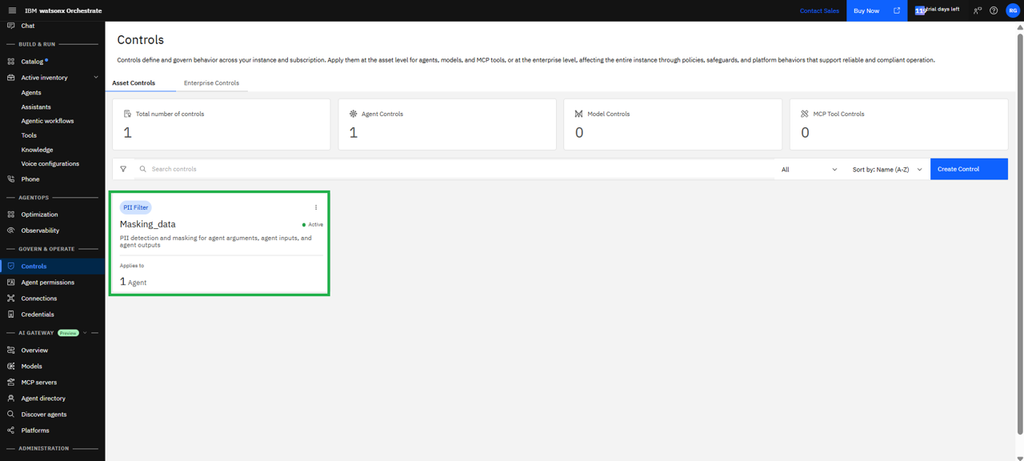
After configuring the PII Filter, assign it to the Lead Management Agent.
- Select the agent Lead_Management_Agent.
- Verify the selected agent and Click Next.
- Review the configuration and Click Create Control.
The control is created and applied according to its configured scope and enforcement settings.
Step 7: Test PII Masking
After configuring the controls, test the agent using sample data.
Example test prompt:
“Show all lead details for Summer Meza in column-wise table”
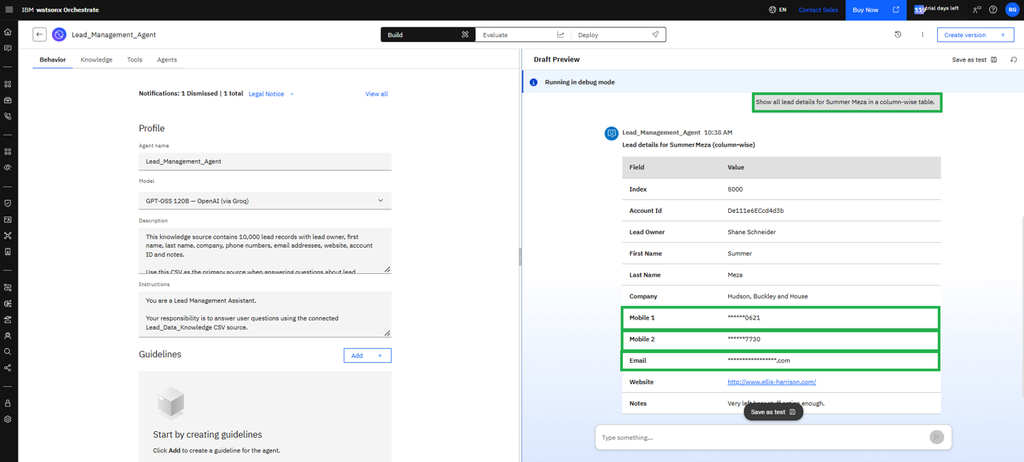
Check the agent response and a newly generated observability trace separately to confirm that both protections are working.
Conclusion
PII protection in IBM watsonx Orchestrate helps organizations reduce the exposure of sensitive information while using AI agents.
By combining Analytics PII masking with agent-level PII Filter controls, organizations can protect observability data and configure detection and masking for agent interactions.
Testing both agent responses and observability traces is important to validate that the configured data protection controls work as expected.